
If you need support with 3D-o-Mat, use this contact page.
You need 3D glasses to see the photos that 3D-o-Mat makes. These are the 3D glasses I use (Amazon affiliate link): http://amzn.to/2tBsFCQ
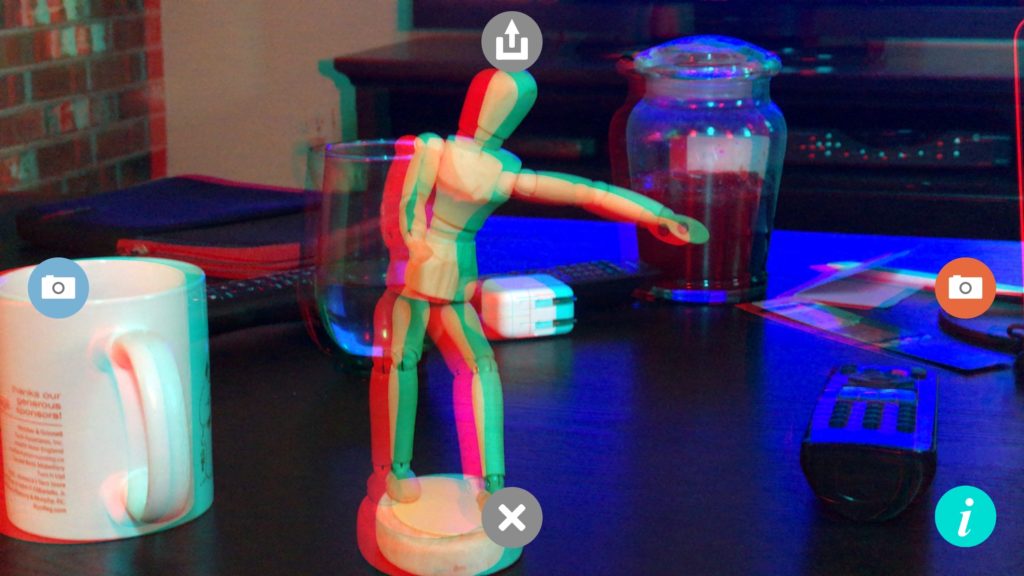
3D-o-Mat is designed so you can use glasses with the red/cyan on either eye. It defaults to cyan on the left, but you can swap it by using the menu under the info button on the bottom right.
Documentation
3D-o-Mat is a simple iPhone and iPad app to take 3D photos that you can view with Red/Cyan 3D glasses (buy them on Amazon (affiliate link)).
When 3D-o-Mat starts it will ask for permission to use your camera. If you give permission, you will be shown a live video feed to take photos from.
If you do not give permission, you cannot use 3D-o-Mat, but if you change your mind, just go to your Settings app, and look under the 3D-o-Mat section to give it permission.
To make a 3D Photo
- Point your device at the subject and tap the left/blue camera button.
- Move your device slightly to the right and tap the right/red camera button.
(try to do this as steadily as possible — you can keep tapping the red button to retake photos) - Look at the photo with Red/Cyan 3D Glasses with the cyan lens on your left eye and the red lens on your right. If your glasses have the red lens on the left, you can swap the sides in 3D-o-Mat by using the menu under the info button on the bottom right.
TIP: Your photos will look best if you set the camera down on a surface or use a tripod. You should experiment with what distance looks best to you, but for far away objects, it will be the distance between your eyes. Shorter distances might look better for close up subjects.
To save or share the Photo
- Tap the gray share button at the top of the screen.
- Choose the app to save or share the photo to.
To start again
- Make sure to save or share your current photo.
- Tap the gray clear button at the bottom of the screen.